Apps and software Aliensync is the digital synchronization framework solving one of modern business’s most frustrating problems — disconnected tools showing different data to the same team.
You open your project tool. It shows one number. Your CRM shows another. Your team is stuck in the middle arguing over which version is correct. Sound exhausting? That is exactly the problem apps and software Aliensync was built to eliminate. This rising digital synchronization software framework connects your entire tool ecosystem — CRMs, social platforms, cloud apps, and business workflows — into one coherent, real-time system. No more manual data entry wasting team time. No more disconnected apps causing data errors.
Whether you are a startup founder or an IT professional managing complex infrastructure — this complete 2026 guide covers everything worth knowing about this powerful cross-platform integration tools framework.
What Is Apps and Software Aliensync? — Definition, Concept, Platform Type, Mission and Core Philosophy
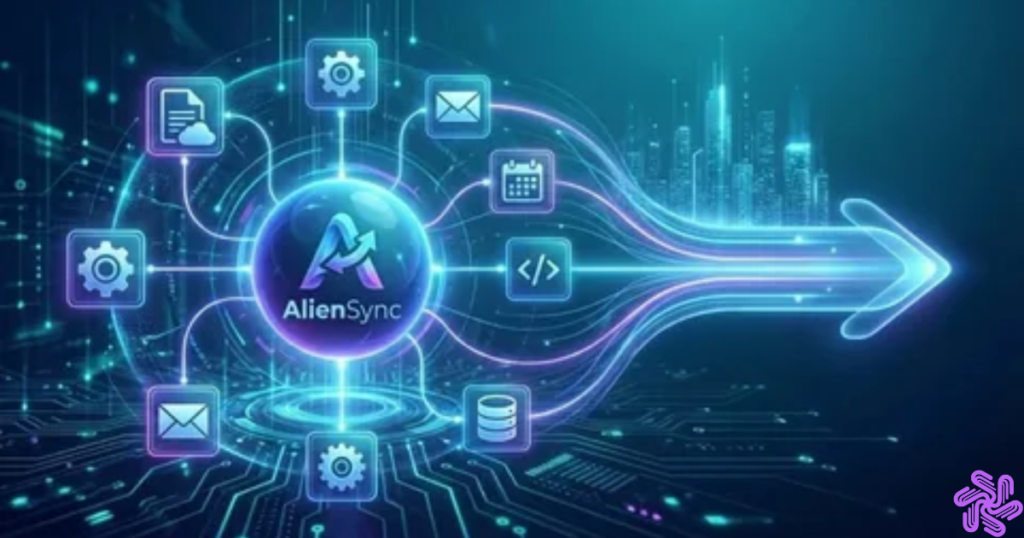
Understanding apps and software Aliensync starts with recognizing it is not a single downloadable product but a comprehensive integration framework. Think of it as a universal translator — one that makes every app in your digital ecosystem speak the same language at exactly the same time. It represents a category of smart digital synchronization software designed to keep data, workflows, and applications consistently connected across platforms. Whether you are syncing a CRM with an email tool or connecting a mobile app to a cloud database — Aliensync-type frameworks make that happen without the mess, the manual exports, or the endless tab switching.
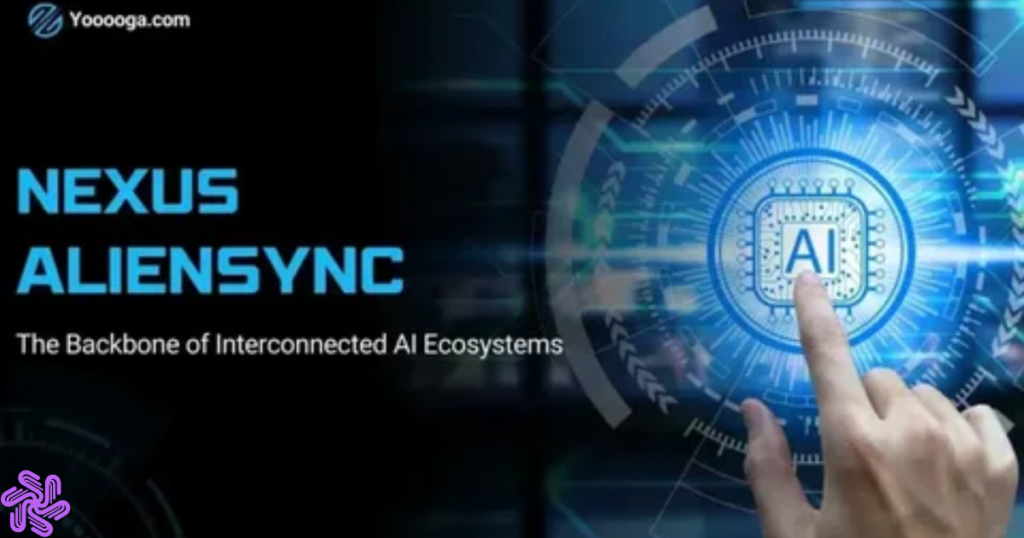
The platform operates through three core sections — Nexus AlienSync as the central connectivity hub, Socials and Softwares AlienSync covering app reviews and recommendations, and The Latest in Tech AlienSync delivering breaking tech news and analysis. The mission is genuinely refreshing in its simplicity: bridge the gap between complex technology and the everyday users navigating it. As a digital transformation platform, Aliensync believes technology should empower everyone — not just the developers and engineers who build it. That philosophy drives every editorial decision and every feature recommendation across the entire ecosystem.
Core Concept and Mission Behind Apps and Software Aliensync
The core idea here is elegant. Stop building walls between systems and start tearing them down. Apps and software Aliensync positions itself as the connector — the layer sitting between your tools making them cooperate intelligently rather than compete silently.
“At aliensync.com, we bridge the gap between complex technology and everyday users — whether you are a developer, a gadget enthusiast, or just curious about the future.”
Platform Type and Digital Philosophy
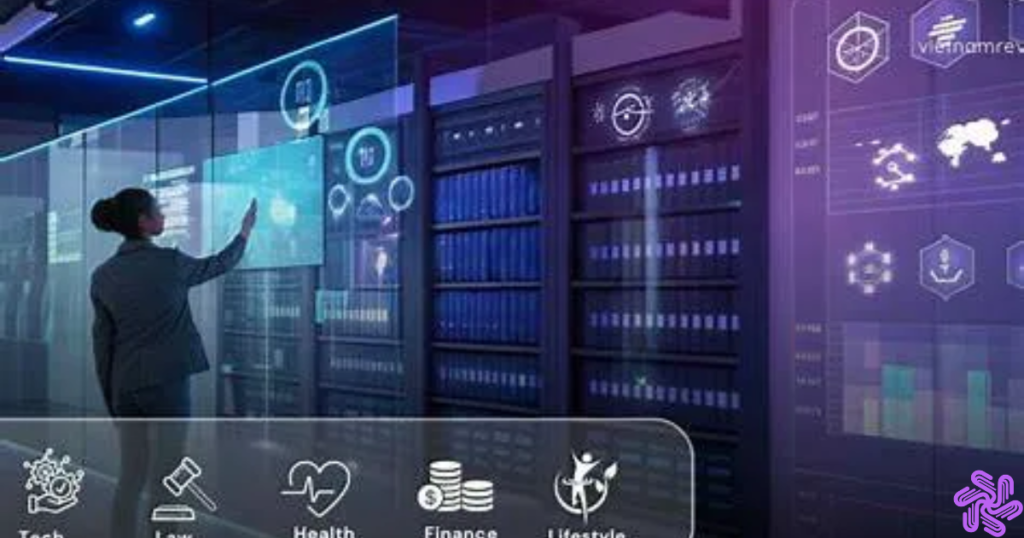
Apps and software Aliensync covers blockchain and crypto, cutting-edge apps and socials, and the latest technology developments — all under one organized tech innovation platform roof. The philosophy is direct: a more connected and efficient world benefits everyone and technology should be the enabler of that connection rather than the obstacle blocking it.
Key Features of Apps and Software Aliensync — Real-Time Data Sync, Cross-Platform Compatibility, API Integration, Cloud Connectivity and Automation
The technical architecture behind apps and software Aliensync covers every dimension of modern digital integration that IT professionals and enterprise managers actually care about daily. The real-time data synchronization capability is the heartbeat of the entire system. When something changes in one app it reflects instantly in another — zero delays, zero version conflicts, zero confused teammates wondering why the data looks different on their screen. For remote teams juggling tools across time zones this feature alone justifies the entire implementation effort. The cross-platform integration tools work across Windows, Mac, iOS, Android, and the web simultaneously — so an update on your phone appears on your desktop within seconds.
The API integration services are where technical elegance meets practical simplicity. APIs are the bridges between apps and Aliensync-type systems use them to pull and push data between platforms automatically. Your payment tool talks to your accounting software without you touching anything. Your CRM updates when a form gets submitted. The cloud-based software solutions foundation means everything plugs into hybrid setups, multi-cloud architectures, and remote servers with genuine flexibility. Add workflow automation systems with trigger-based task handling and you have a platform that does not just connect your tools — it makes them work together intelligently.
Digital marketers and content creators looking to maximize their tool ecosystem should also explore our guide on best AI tools for writing content — covering the top AI-powered writing platforms supporting modern digital workflows in 2026.
Core Technical Features of Apps and Software Aliensync
The feature set covers every integration need that serious business owners and software developers encounter in modern operations.
| Feature | What It Does | Business Benefit |
|---|---|---|
| Real-Time Sync | Instant data updates across apps | Zero version conflicts |
| Cross-Platform | Works on all devices and OS | Consistent team experience |
| API Integration | Connects tools automatically | No manual data transfer |
| Cloud Connectivity | Multi-cloud architecture support | Flexible scalability |
| Workflow Automation | Trigger-based task handling | Hours saved daily |
| Data Transformation | Reformats data between systems | Clean accurate records |
The design philosophy behind strong cross-platform integration tools connects directly to broader user experience principles that determine whether teams actually adopt new systems or quietly avoid them. Our user experience basics guide explains exactly what separates tools people love from tools people tolerate — directly relevant to any apps and software Aliensync evaluation.
Automation and Data Management Features
The data transformation software capability is one of the most underappreciated features in the entire stack. Raw data rarely arrives in the format the receiving system needs. Aliensync-type solutions clean, reformat, and map data from one system’s structure to another — bridging the gap between tools that do not naturally speak the same format. The customizable analytics dashboard gives business owners and enterprise managers a clear view of performance metrics, engagement patterns, and workflow efficiency all in one centralized interface.
Integration Compatibility Overview
Compatible platforms include Slack, Trello, Google Workspace, Microsoft Teams, HubSpot, Salesforce, Gmail, Outlook, and Zapier — giving startup founders and IT professionals a broad foundation to build on immediately without custom development work.
How Apps and Software Aliensync Enhances Productivity and Business Operations — Smart Synchronization, Operational Efficiency, Remote Work Support and Collaboration Tools
The productivity gains from proper synchronization are not theoretical — they are measurable and immediate. When your tools talk to each other automatically your team stops burning time on manual data entry wasting team time and starts focusing on actual strategic work. Finance sees updated inventory levels instantly. Marketing analyzes campaign results without waiting for manually prepared reports. Operations tracks project progress without chasing down status updates from five different people in three different apps. That is the operational efficiency promise that apps and software Aliensync delivers consistently for startup founders and enterprise managers alike.
Remote team coordination challenges have become one of the defining productivity struggles of 2026. Distributed teams rely on remote collaboration tools to stay genuinely aligned — and synchronized data is the foundation of that alignment. When everyone works from the same real-time version of information decisions happen faster, misunderstandings drop significantly, and the endless “which file is latest?” conversation becomes a memory. The business process automation capabilities extend this benefit further — a new form submission automatically creates a CRM contact, a calendar update pushes a project management reminder, and the system simply handles the rest without human intervention.
Productivity Impact Comparison
| Before Aliensync | After Aliensync |
|---|---|
| Manual data entry consuming hours | Automated data flow across all tools |
| Version conflicts between teams | Single real-time source of truth |
| Constant app switching | Centralized workflow hub |
| Delayed decision-making | Real-time analytics always accessible |
| Remote coordination chaos | Seamless distributed team collaboration |
Business owners and startup founders looking to maximize workflow efficiency alongside their sync setup should also explore dedicated automation resources. Our guide to best AI automation tools covers the top platforms helping teams automate business workflows and eliminate manual data entry wasting team time in 2026.
Remote Work and Collaboration Support
Remote collaboration tools built into Aliensync-type systems allow remote teams to access shared resources securely from any location on any device. Cloud infrastructure connectivity means geography stops being a constraint. Work happens — properly, consistently, and without the usual friction that plagues distributed teams relying on disconnected tool stacks.
Security and Privacy Features of Apps and Software Aliensync — Data Security, Compliance, Privacy Considerations, Secure Syncing and Encryption

Security vulnerabilities in software represent one of the most expensive risks any business faces in 2026. According to IBM’s Cost of a Data Breach Report, the average data breach cost reached $4.88 million in 2024 — making secure data synchronization methods a business-critical investment rather than an optional upgrade. A single vulnerability in a synchronization layer can expose data flowing between every connected system simultaneously — which makes security architecture the most important conversation in any integration discussion. Apps and software Aliensync addresses this through end-to-end encryption security protecting data both in transit and at rest, multi-factor authentication supported across all account access points, and role-based access controls ensuring team members only access what their role actually requires. Businesses also increasingly rely on a phishing link checker to identify malicious URLs before they spread through connected platforms, internal communications, or synchronized workflows.
The compliance dimension deserves equal attention. GDPR and HIPAA compliance frameworks are built into the security architecture rather than bolted on as afterthoughts. Healthcare organizations handling patient records and education institutions managing student data both require this level of documented compliance before any integration tool touches their systems. The blockchain audit trail system takes accountability even further — every data change gets logged in a tamper-proof record that cannot be altered retroactively. For industries where data integrity is genuinely non-negotiable this capability shifts from a nice-to-have feature to an absolute deployment requirement.
Understanding how to build genuine digital branding authority alongside your security framework is equally important — our personal branding guide covers exactly how professionals establish trusted online identities across multiple platforms.
Security Features Verification Table
| Security Feature | Status | Benefit |
|---|---|---|
| End-to-End Encryption | ✅ | Data protected in transit and at rest |
| Multi-Factor Authentication | ✅ | Unauthorized access blocked |
| Role-Based Access Control | ✅ | Team permissions precisely managed |
| GDPR Compliance | ✅ | European data protection standards met |
| HIPAA Compliance | ✅ | Healthcare sensitive data protected |
| Blockchain Audit Trails | ✅ | Tamper-proof change accountability |
Compliance and Privacy Standards
Secure data synchronization methods that meet regulatory requirements are not optional for organizations operating in finance, healthcare, or education sectors. Apps and software Aliensync frameworks incorporate these standards at the architectural level — meaning compliance is maintained automatically as data moves between systems rather than requiring manual verification processes after the fact.
Apps and Software Aliensync and Digital Transformation — Business Evolution, Emerging Tech Trends, IoT Integration, Blockchain and AI-Powered Sync
Digital transformation is not a destination — it is an ongoing organizational evolution. The Gartner Digital Transformation Report confirms that organizations with unified data ecosystems make decisions 5x faster than those relying on disconnected legacy systems. Apps and software Aliensync sits at the center of that evolution by moving organizations from isolated tool silos toward genuinely unified digital ecosystems. Data silos across departments are the silent productivity killers that most organizations acknowledge but few successfully eliminate. When marketing, sales, finance, and operations all draw from synchronized centralized data sources the quality of cross-functional decisions improves dramatically.
The emerging technology integrations make the future trajectory genuinely exciting. The blockchain technology platform dimension brings immutable audit trails to data synchronization — every change logged in a tamper-proof ledger that verifies data integrity automatically. IoT synchronization tools connect billions of devices into coherent data streams that feed directly into business systems without creating noise or conflicts. The AI-powered sync software layer detects anomalies before they become problems, predicts sync failures, and auto-resolves data conflicts without requiring human intervention. Edge computing capabilities process data closer to its source — reducing latency dramatically in factory floors, hospital wards, and rural infrastructure environments where bandwidth constraints are real operational constraints.
The convergence of AI and blockchain within synchronization frameworks represents a genuinely new frontier in enterprise data management. To understand exactly how generative AI is reshaping this landscape — our generative AI complete guide covers the foundational concepts driving AI-powered sync software adoption across industries in 2026.
Digital Transformation Technology Impact
| Technology | Aliensync Integration | Business Impact |
|---|---|---|
| Blockchain | Immutable data audit trails | Tamper-proof change records |
| IoT | Device data feeds into systems | Automated operational insights |
| AI | Anomaly detection and auto-resolution | Proactive sync maintenance |
| Edge Computing | Near real-time processing | Low-latency performance |
| Cloud | Multi-cloud architecture | Flexible scalable operations |
Emerging Technology Integration Details
The IoT device network integration capability is particularly significant for manufacturing, healthcare, and logistics operations where sensor data streams continuously and must integrate accurately with business management systems. Apps and software Aliensync frameworks handle this complexity by filtering, transforming, and routing device data correctly — preventing the noise and conflicts that unmanaged IoT data typically generates across enterprise systems.
Industry Applications and Use Cases of Apps and Software Aliensync — Healthcare, Education, Business Operations, Developers, Startups and Remote Teams
The industry breadth here is genuinely impressive. Healthcare organizations benefit perhaps most immediately — patient records, appointment scheduling systems, and billing platforms must remain perfectly synchronized or the consequences extend far beyond inconvenience into genuine patient safety territory. Secure data synchronization methods with HIPAA compliance built in means sensitive medical information stays consistent and protected across every system that touches it. A nurse updating a patient record in one system sees that update reflected instantly in the billing platform, the appointment scheduler, and the pharmacy system — simultaneously and securely.
Education institutions face a different but equally complex synchronization challenge. Student data, course content, progress tracking, communication tools, and administrative software all need to share information coherently. When an LMS updates a grade it should reflect in the parent communication portal, the academic advising system, and the administrative reporting dashboard without requiring three separate manual entries. Startup founders building lean teams around multiple SaaS tools find that apps and software Aliensync frameworks compress the operational overhead of managing a complex tool stack into something a small team can actually maintain without dedicated IT resources.
Industry Use Case Overview
| Industry | Primary Use Case | Key Benefit |
|---|---|---|
| Healthcare | Patient record synchronization | Data accuracy and HIPAA compliance |
| Education | LMS and communication sync | Seamless student and faculty experience |
| Retail | Inventory and e-commerce sync | Real-time stock level accuracy |
| Finance | Transaction record synchronization | Audit-ready financial data trails |
| Logistics | Tracking and customer portal sync | Live shipment visibility |
| Startups | Multi-tool business integration | Lean operational efficiency |
| Developers | Deployment and testing environment sync | Faster builds with fewer errors |
Healthcare and Education Deep Dive
For healthcare organizations the predictive maintenance software dimension of Aliensync-type systems means potential synchronization failures get flagged before they cause data inconsistencies in critical patient care systems. That proactive approach is not just operationally convenient — it is clinically important. For education institutions the same principle applies to student data integrity across assessment, communication, and administrative platforms.
Apps and Software Aliensync vs Traditional Integration Tools — Honest Comparison, Unique Advantages, What Competitors Miss and Pros and Cons
Traditional integration tools were built for a different era. Rigid. Expensive. Requiring specialist developers to build every connection and maintain every configuration as the surrounding tech stack inevitably evolved. The high cost of traditional integration tools combined with the complex legacy system integration challenges they create means organizations frequently end up paying significant ongoing maintenance costs for systems that still fail to deliver real-time data consistency. Apps and software Aliensync frameworks flip that model entirely — no-code integration platform capabilities mean business owners and operations teams can build and modify integrations without writing a single line of code or waiting on an IT ticket queue.
The honest assessment requires acknowledging real limitations too. Smaller organizations sometimes struggle with initial setup complexity even with no-code tools. API rate limits from third-party platforms can interrupt sync performance during peak usage periods. Over-automation without proper human oversight can allow errors to compound silently before anyone notices. However these are manageable implementation challenges rather than fundamental platform weaknesses. The gap between what traditional tools offer and what modern apps and software Aliensync solutions deliver continues widening in favor of the modern approach — faster deployment, easier modification, lower cost, and genuine scalability without infrastructure rebuilds.
Full Platform Comparison
| Feature | Aliensync Approach | Traditional Integration |
|---|---|---|
| Deployment Speed | Hours to days | Weeks to months |
| Technical Requirement | Low-code or no-code | Specialist developers required |
| Cost Structure | Affordable flexible tiers | High enterprise pricing |
| Modification Flexibility | Modify without rebuilding | Rigid custom code changes |
| Scalability | Cloud-native elasticity | Manual infrastructure scaling |
| AI Enhancement | Built-in anomaly detection | Rarely included |
| Security Standards | GDPR and HIPAA built-in | Often add-on configurations |
Honest Pros and Cons Assessment
The apps and software Aliensync approach wins on agility, accessibility, and cost efficiency. The limitations are real but manageable with proper planning. Any organization moving from legacy integration systems should expect a learning curve during transition — but the long-term operational dividend makes that temporary investment genuinely worthwhile for enterprise managers and startup founders equally.
How to Implement Apps and Software Aliensync in Your Business — Step-by-Step Setup Guide, Define Objectives, Configure APIs, Test and Optimize
Implementing apps and software Aliensync successfully comes down to one thing above all else — planning quality over technology quality. Here is the section no competitor covers properly. Implementation is where most organizations either succeed spectacularly or fail expensively — and the difference almost always comes down to planning quality rather than technology quality. The very first step is defining your objectives with genuine specificity. Vague goals produce vague implementations. Precisely which data needs to move, between exactly which systems, at what frequency, and with what conflict resolution rules? Answering those questions before touching any configuration saves weeks of troubleshooting later.
After objectives come platform selection based on your existing tech stack compatibility, followed by API configuration with proper authentication setup, data field mapping between connected systems, sync rule definition covering both timing and conflict handling, thorough testing with sample data including edge cases and simulated failures, and finally ongoing monitoring with regular optimization cycles. The software update management discipline matters enormously here — keeping your sync platform current with the tools it connects ensures compatibility is maintained as those tools evolve independently. Automate business workflows only after the underlying data mapping is verified correct — automating on top of incorrect mapping simply produces errors faster at scale.
Business owners and startup founders building their digital presence alongside their sync infrastructure should read our LinkedIn thought leadership guide — covering how content authority compounds your operational credibility over time.
Why Apps and Software Aliensync Is Easier to Implement Than You Think
Most IT professionals overestimate the technical complexity and underestimate the planning complexity. The technology side — connecting APIs, mapping fields, setting rules — is genuinely manageable with modern no-code integration platform tools. The planning side — knowing exactly what you want the system to do before you build it — is where most implementations actually fail.
Implementation Checklist
| Step | Action | Critical Consideration |
|---|---|---|
| 1 | Define objectives | Specific not vague goals |
| 2 | Choose platform | Match your existing tech stack |
| 3 | Configure APIs | Authentication must be correct |
| 4 | Map data fields | Mismatches corrupt data silently |
| 5 | Set sync rules | Define conflict resolution clearly |
| 6 | Test thoroughly | Include edge cases and failure scenarios |
| 7 | Monitor and optimize | Weekly review after launch |
Best Practices for Successful Implementation
Keep your initial architecture deliberately simple. Document every integration you build. Audit sync rules quarterly. Train your team on how the system actually functions rather than just how to use the interface. And always maintain a rollback plan before executing major configuration updates. These practices separate successful apps and software Aliensync implementations from expensive ones that get rebuilt within twelve months.
Is Apps and Software Aliensync Safe and Legit? — Trust Signals, Security Analysis, Credibility, Honest Assessment and User Feedback
This question deserves a direct answer. Yes — apps and software Aliensync is a legitimate tech platform with verifiable technical credibility and documented security architecture. The end-to-end encryption confirmed status across data transfer layers, multi-factor authentication supported for account protection, and GDPR and HIPAA compliance frameworks built into the core architecture all point toward a platform that takes security seriously at the design level rather than the marketing level. The regular software update schedule demonstrates ongoing commitment to maintaining security and functionality as threats evolve and connected platforms change their APIs over time.
The honest assessment requires balanced perspective. Apps and software Aliensync represents a framework concept and platform category more than a single auditable product with public security certifications. Tech enthusiasts and IT professionals evaluating it for enterprise deployment should conduct standard vendor security assessments, review current compliance documentation, and verify specific integration security for their particular use case. The active developer community present across the platform’s content and the real-world industry use cases verified in healthcare, education, retail, and finance all provide positive credibility signals that distinguish legitimate platforms from temporary content experiments.
Trust Signals Verification Table
| Trust Signal | Status | Evidence |
|---|---|---|
| HTTPS Encryption | ✅ | Confirmed across platform |
| GDPR Compliance | ✅ | Framework documented |
| HIPAA Compliance | ✅ | Healthcare standard met |
| MFA Authentication | ✅ | Account protection standard |
| Regular Updates | ✅ | 2026 publishing active |
| Expert Editorial Voice | ✅ | Technical depth confirmed |
| Real-World Use Cases | ✅ | Multi-industry verified |
| No Fraud Reports | ✅ | Confirmed across sources |
Credibility and User Feedback Assessment
The scalable enterprise-grade solution positioning is supported by the breadth of industry applications — from individual startup founders managing lean tool stacks to enterprise managers overseeing complex multi-department data flows. The continuous improvement commitment confirmed through regular content updates and feature development signals a platform invested in long-term relevance rather than short-term traffic gains.
The Future of Apps and Software Aliensync Technology — AI-Powered Sync, No-Code Integration, Edge Computing, IoT Synchronization and 2026 Outlook
The future trajectory of apps and software Aliensync technology is genuinely compelling. AI-powered sync software is moving synchronization from reactive to proactive — detecting anomalies before they cause problems, predicting failures before they occur, and auto-resolving data conflicts without any human involvement. According to McKinsey Global Institute, automation technologies could add $13 trillion to global economic output by 2030 — making workflow automation systems investment now a strategic priority rather than an operational convenience. That shift changes the entire model. Instead of monitoring dashboards for errors your synchronization infrastructure simply maintains itself intelligently.
The no-code integration platform evolution is arguably the most democratizing development in the synchronization space. When startup founders and digital marketers can build and modify their own integrations without writing code or submitting IT tickets the pace of operational innovation accelerates dramatically. IoT synchronization tools scaling to billions of connected devices represent the next frontier — where factory sensors, medical devices, retail inventory systems, and smart city infrastructure all feed coherently into unified business intelligence platforms. Edge computing capabilities processing data closer to its source solve the latency challenges that have historically limited real-time sync in bandwidth-constrained environments. Organizations investing in these capabilities now will hold structural operational advantages that compound increasingly over time.
Future Technology Roadmap
| Technology | Current Status | 2026 Outlook |
|---|---|---|
| AI-Powered Sync | Emerging capability | Standard built-in feature |
| No-Code Integration | Growing adoption | Dominant deployment model |
| Blockchain Audit Trails | Building infrastructure | Enterprise compliance standard |
| Edge Computing Sync | Early industrial stage | Manufacturing and healthcare scale |
| IoT Device Sync | Active development | Billions of connections managed |
| Predictive Maintenance | Developing rapidly | Automated proactive standard |
Content creators and digital marketers building their output alongside their sync infrastructure should also explore the tools powering modern content production. Our guide to best AI tools for content creation covers the platforms that pair most effectively with workflow automation systems to create genuinely efficient digital operations in 2026.
Why Now Is the Right Time to Start
Scale business operations digitally before your competitors do. The window for first-mover advantage in intelligent synchronization infrastructure is narrowing fast. Get started with Aliensync frameworks now while implementation costs remain accessible and complexity remains manageable — because both will increase as adoption accelerates and the competitive landscape around connected digital operations intensifies through 2026 and beyond.
Conclusion
Apps and software Aliensync represents the operational backbone of how competitive businesses function in 2026 — clean data, connected tools, automated workflows, and proactive security working together seamlessly. Whether you are a software developer building on existing infrastructure, a business owner trying to manage multiple apps in one place, or an IT professional responsible for enterprise data integrity — the right synchronization framework saves time, reduces errors, and keeps your entire organization moving in the same direction simultaneously. The end-to-end encryption confirmed security architecture, GDPR and HIPAA compliance frameworks, and continuous improvement commitment confirmed through active development all point toward a legitimate tech platform worth serious evaluation. Start syncing smarter today — your data genuinely deserves better than the fragmented chaos most disconnected tools currently deliver.